3A70.28 • Coupled Oscillations: Normal Modes of Three Spring-Coupled Masses
Location: Floor Demo
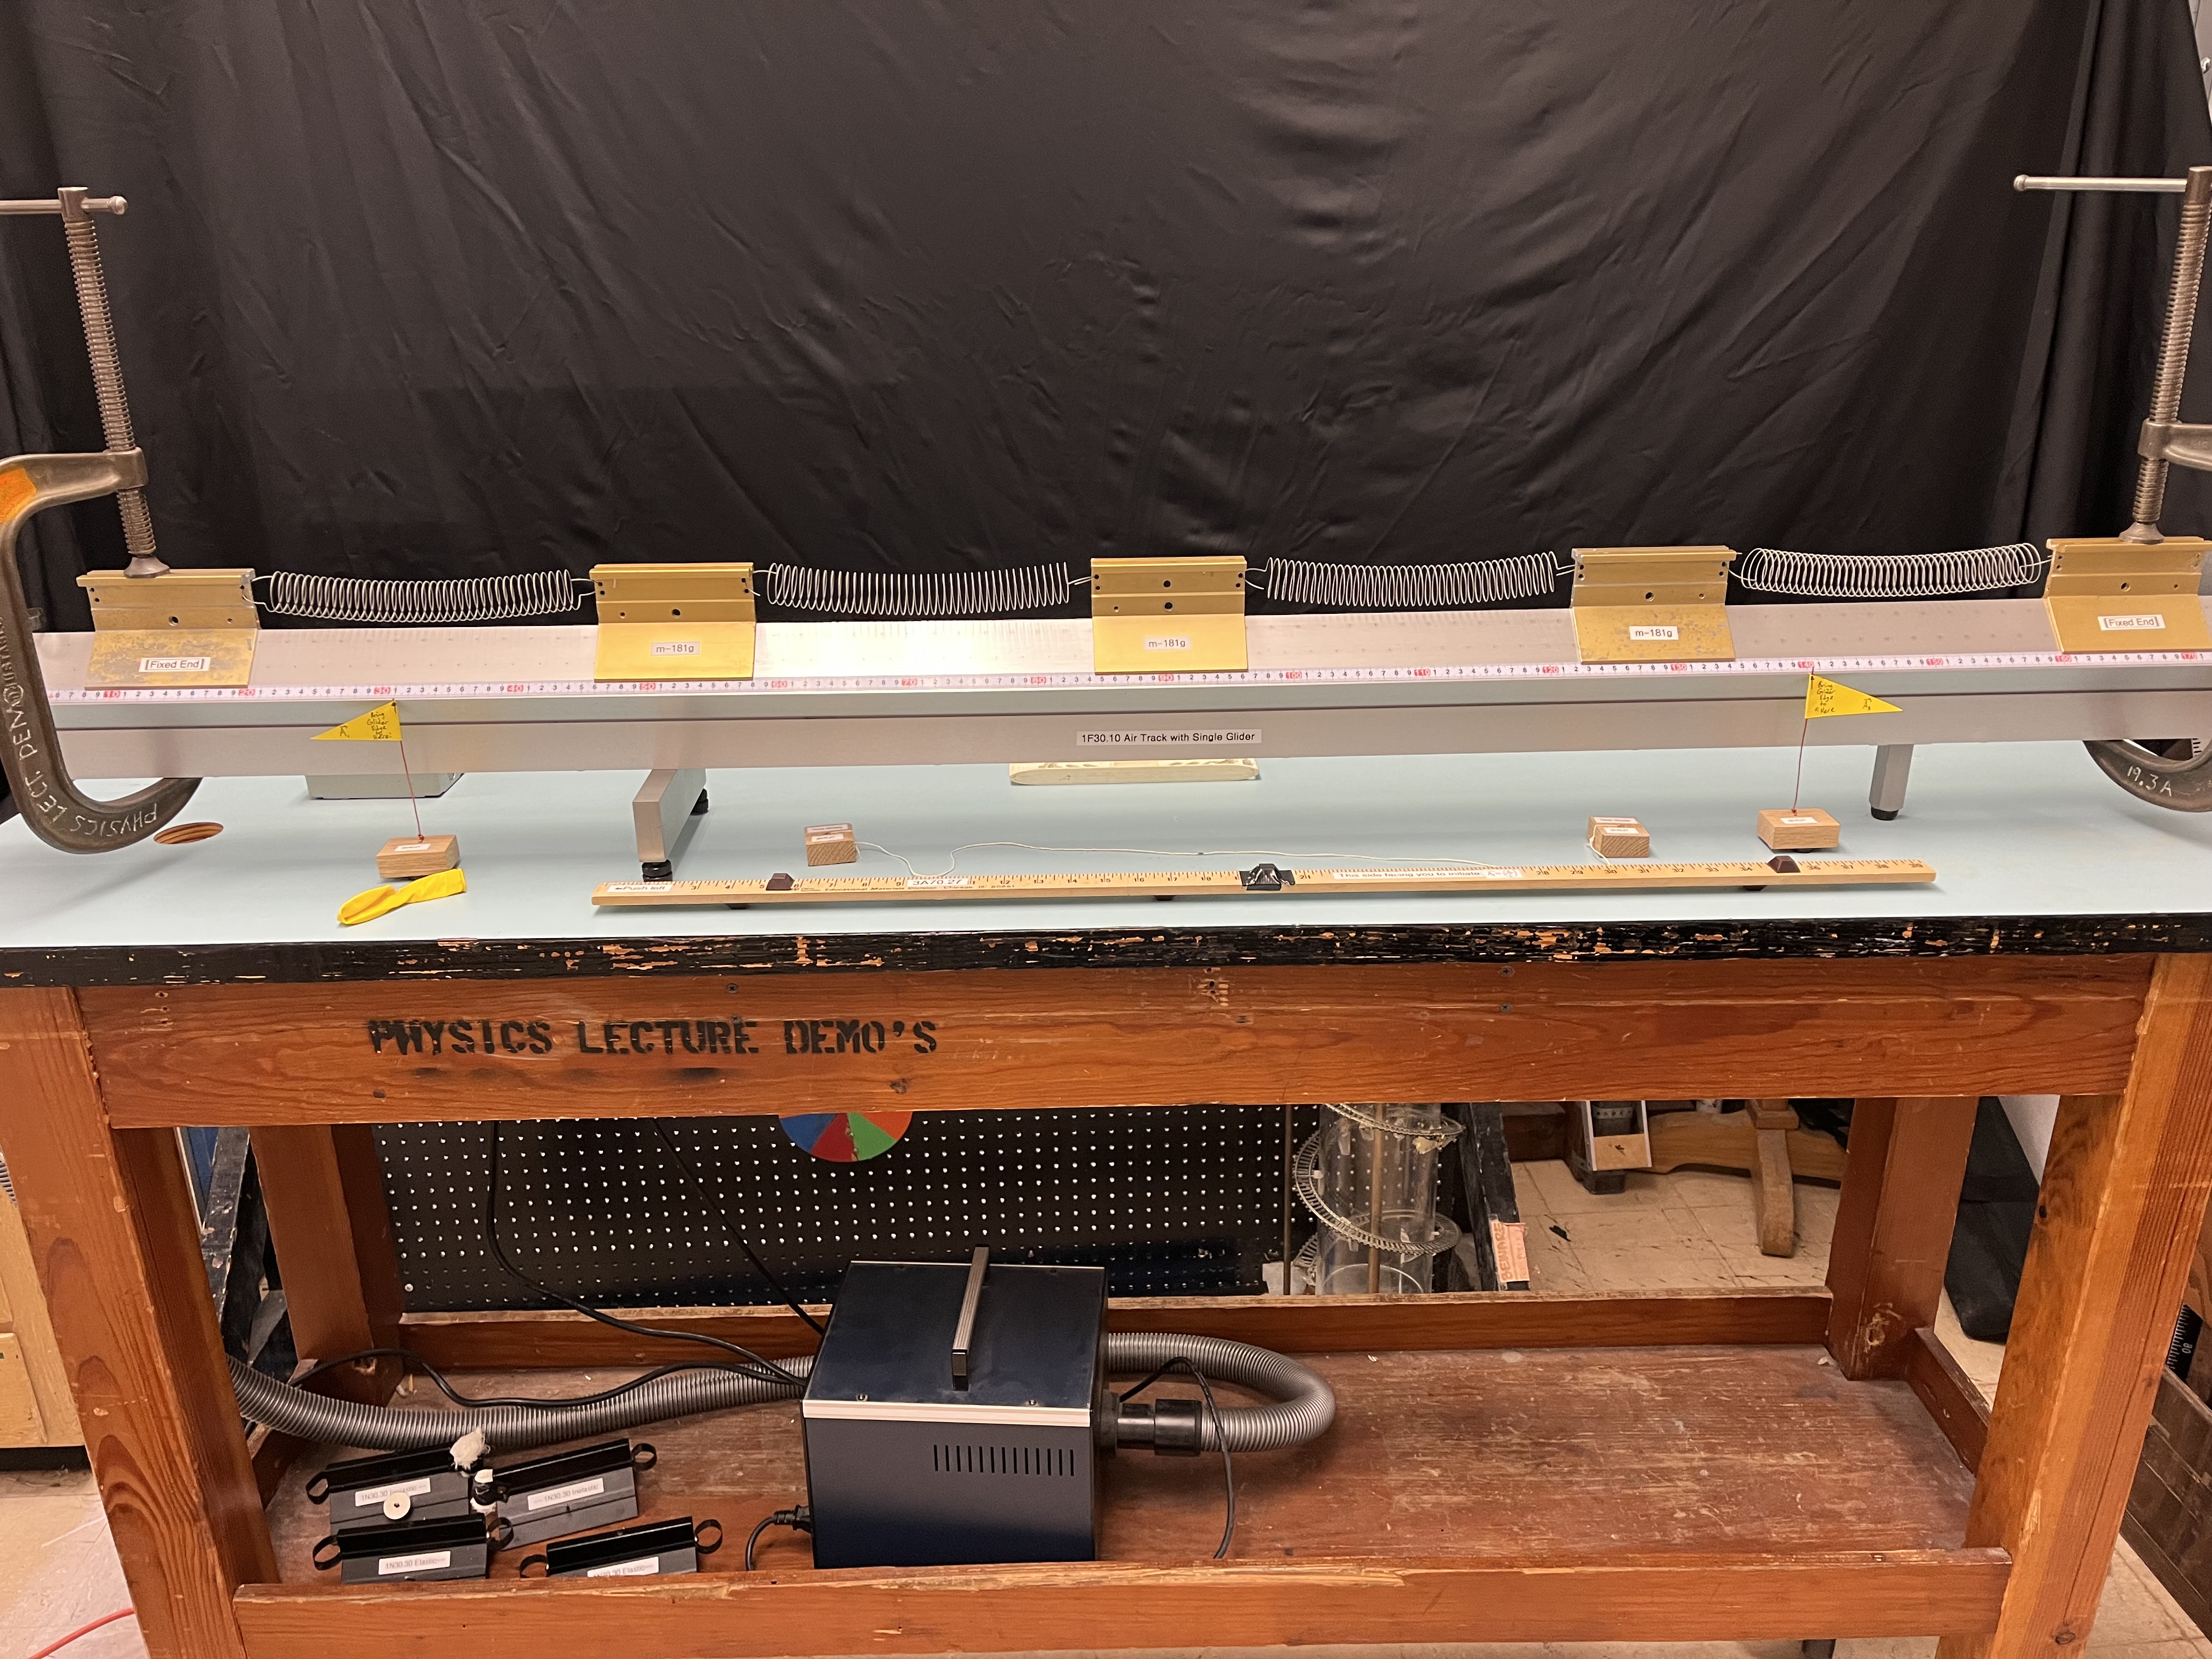
Photo shows the demonstration used at the University of Texas at Austin.
Concepts Conveyed:
- Simple harmonic systems of coupled oscillators have certain normal mode frequencies at which every oscillator in the system will oscillate when the system is oscillating in the corresponding normal mode.
- While the system is oscillating in a normal mode, the oscillators may be in or out of phase and may have oscillations of different amplitudes.
- Any way the system can oscillate is some linear combination of these normal modes.
Instructions/Notes:
- Initiating normal mode with eigenvector
- Hold the initiation meterstick with the correct side facing you and the arrow pointing to the left.
- Use the meterstick to displace the left edge of the leftmost glider 15.0 cm to the left, to the arrow of the left yellow flag*.
- First, the middle glider will be caught by the bumper on the meterstick and wind back, and then, the two outer gliders will follow suit.
- Quickly pull away the meterstick from the track, taking care not to disturb the gliders’ positions.
- To initiate the normal mode with eigenvector
- Grab the string-tied wood blocks, and use them to displace the two outer gliders in opposite directions as far as the string allows.
- Make sure the central black marking on the string is lined up with the center of the middle glider, around the 90. cm mark* range.
- Quickly pull the blocks away from the track.
- To initiate the normal mode with eigenvector
- Place the latex balloon under the leftmost glider to prevent it from moving. A third hand holding the glider in place, of course, is preferred and will work even better.
- Hold the initiation meterstick with the correct side facing you and the arrow pointing to the right.
- Move the middle glider towards the leftmost glider until both can fit within the left two bumpers on the initiation meterstick, and place the meterstick down holding the two gliders in place between these two bumpers.
- You may then need to get the rightmost glider to the right of the rightmost bumper on the meterstick to hold it in place there as it should be.
- With the bumpers on the meterstick holding the gliders in place, remove the balloon from under the leftmost glider.
- With the bumpers on the meterstick holding the gliders in place, remove the balloon from under the leftmost glider.
- Using the meterstick displace the two outer gliders 6.0 cm to the right of their initial resting positions, to the arrow of the yellow flag on the right*.
- Quickly pull away the meterstick from the track, taking care not to disturb the gliders’ positions.
Demo Staff:
- To set up:
- Clear the PASCO air track of any other demos and put them on the bottom shelf of the table, and ensure the track faces you such that the switch is behind the track.
- Place one of the two gliders labeled “Fixed End” on the track with its inner (right) edge aligned with the 20.0 cm mark and the other with its inner (left) edge aligned with the 160.0 cm mark.
- Clamp both of the “Fixed End” gliders to the track with the big C-clamps.
- Place the three “m—181g” gliders on the track between the two fixed gliders.
- Grab the four springs and place each between any two gliders, free or fixed, threading the open ends of their handles through the top holes along the edges of the gliders.
- Make sure the air supply on the bottom shelf is plugged in and switched on.
- Turn on the air track with the flip switch behind it.
- Place one of the two yellow flags with its upward arrow aligned with the mark 6.0 cm to the right of the resting position of the right edge of the rightmost glider* and pointing to the right.
- Place the other flag with its upward arrow aligned with the mark 15.0 cm to the left of the resting position of the left edge of the leftmost glider* and pointing to the left.
- Include the initiation meterstick, the latex balloon, and the string-tied wood blocks labeled “Three Masses” with this experiment.
- *For best results on
, let the gliders come to their resting positions with the air track turned on, make note of the position of the left edge of the leftmost glider to the tenth, subtract 15.0 cm from this position, and place the left flag such that its arrow aligns with that mark. This should be within the 30.0-33.0 cm range.
- *For best results on
, take note of the resting positions of the left and right edges of the middle glider, get the average of them, and that is the mark where the central black marking should be aligned with before releasing. This mark should be within 89.0-91.0cm. You can place a piece of marked tape to remember, but there is no third flag for this.
- *For best results on
, take note of the resting position of the right edge of the rightmost glider to the tenth, add 6.0 cm, and place the right flag such that its arrow aligns with that mark. This should be within the 139.0-143.0 cm range.
Last updated on February 18, 2026